Sunday, August 28, 2011

All hands man your battlestations

Saturday morning started with light to moderate rain and wind before dawn. Both increased over the next 12-14 hours until dying off around 0200 Sunday morning. I went out around 1300 for a little famous fried chicken from Popeye's, much to the chagrin of my wife who wanted me to hang out at the house. Damn that was some good chicken and biscuits, she enjoyed them too.

The local conditions were not that bad at the time. A few spots on major roadways with minimal standing water, primarily a hydroplane issue at posted speed limits but not at anything below and definitely no threat of a flooded vehicle or float away. Wind in open roadways was not significant but 'seemed' much worse in the neighborhoods and around structures. Minimal debris was present and what was present was finger sized branches and smaller.

After chowing down and deciding to stay in unless an emergency required leaving the house I grabbed a little shut eye in preparation for the potential of power outages and any complicating factor that would come with LE/FIRE/EMS being task saturated over the next few hours to days. As I was dosing off I noticed the lights flickering off and on but no sustained outage. Around 1530 I woke up to a slightly warmer house with no power. After a quick check of the exterior and neighborhood I found the outage was not isolated to our house and no damage had been sustained. Water and sewer services were still intact and cell voice and data were still up.

By this time larger organic debris was coming down with numerous branches in the size range of 4-8" in diameter coming down. By 1700 a tree with an estimated diameter of 20" fell into a house down the block causing moderate structural damage. Fire Department was able to respond and perform a basic investigation with no other services rendered on scene, residents made the decision to evacuate and left shortly after the single FD unit cleared up.

As there wasn't much for us to do we broke out the board games I had picked up a number of years ago for morale preps. I had found these on sale at one of the big box stores and picked them up for pretty cheap. They don't require batteries and most use large font for easy reading under candle light. We started out playing Sorry, I lost the first round and won the second. Later we would play Scrabble, I lost by just over 40 points. Can't win'em all...
From Blog album


For dinner we used the grill and a camp stove to prepare a tasty meal of bacon wrapped chicken kabobs, broccoli, and instant mashed potatoes. An excellent meal while we relaxed inside and out of the elements.

Once the sun went down, we had another round of board games and keeping an eye on the goings on around the house. There was functionally no activity in the neighborhood and even with at least two neighbors running generators it was fairly easy hear any 'unnatural' noises. With overcast skies and little to no 'human light' I was still able to view good detail under NODs without the use of an illuminator.

With security measures in place we settled into our night routine. Around 0330 the power came back on windows were closed up and we returned to using AC and fans to maintain a comfortable temp. I checked the house for any issues with power coming back on line and found none. Kept an eye on other houses for any issues, not knowing if anyone had been cooking or sustained damage during the outage that may result in a fire. Nothing abnormal was observed for remainder of night.

Clean up has commenced throughout the day of debris. The house sustaining the tree fall had the tree removed by dusk today with a surprisingly quick response. The following are some maintains and improves:

Maintain:
-Assessment, plan/schedule, execute
-Stock up and inventory with rational goals
-Board games
-Candles with caution


Improve:
-Do a better job of keeping cell phones plugged in during 'final hours'. This was a last minute thought.
-Make a sign to remind conservation of hot water. Water heaters are fairly well insulated and will keep water warm weven with power off for some time. I was able to take a quick shower around midnight and still had very hot water available after being nine hours into the outage. That being said, my lovely wife used a good bit of hot water washing dishes forgetting that our water heater was electric and not gas.
-Unplug electronics when power begins to flicker. I managed to kill a router by not unplugging it while power was blinking. Luckily I had a backup to get back online when power returned.

Overall our assessment was fairly accurate and our plan was appropriate. While we could have avoided minimal inconvenience by moving farther west and staying with friends/family/hotel it was completely unnecessary in my mind. The threat was fairly minimal even up to the last reports before we started getting rain. Had we needed to leave we had standard plans in place but this time bugging in was a perfectly functional plan.

All in all a great opportunity to work on preps and doing a run through.

Hopefully this has been helpful to some.

Until next time, stay sharp,

Mike

Friday, August 26, 2011

Calm before the storm

or panic, depending on your situational awareness and preparations. My list was pretty easy today. As you may remember from my schedule outline on Wednesday that I had the following to complete:

Friday:
-Organize and inventory stocks. This is particularly important for the frig/freezer. Having an inventory will limit the number of times you have to open the unit to get food out for meals which will help to keep the cold air in and the warm air out.
-Fuel up vehicles. I would do this with a little time to spare and then top off just before the storm is about to hit. In the event a storm that isn't supposed to hit hard changes at the last minute you won't end up getting no fuel due to a run on the pumps. You also don't want to be forced into waiting in a 30 vehicle line with half a tank of gas as opposed to having the option to decide when you are down a days worth of driving from a full tank. For most that will be no more than a 1/4 tank.


Organizing was easy as most everything was pretty orderly since stocking the freezer with bottled water. Inventory went quickly as all our frozen foods had been bagged in meal sized quantities when we put them in the freezer, it was a simple matter of getting a count of each type of chow.

Fueling up was a little more interesting...
When I went to the bank today I had to go through the local strip center that had a Kroger (grocery store for those not in the south/east) and a gas station. The parking lot for Krogers was packed and the gas station had 3-4 cars in line for each pump. I had planned to top off after the bank because I was between 3/4 of a tank and full from daily errands since I filled up earlier in prep for the storm. I decided I would pass on the pumps at this location/time knowing I was going out to dinner later. As I passed by the gas station I noticed a number of people getting out of their vehicles while in line, obviously unhappy about being in line at 4:30 in the afternoon on a Friday as Irene moves up the coast.

I headed back to the house and the next gas station up the road only had four cars fueling up across 16 pumps. I pulled in and fueled up with ease, made a pass through the inside of the station and saw that they were well stocked on cases of water and their propane tank exchange rack was full of new tanks. Should I need to pick up any last minute items should the storm take a turn I had options that were potentially a better bet than the larger stores.

So, after taking care of what I needed to do both on the preps side and normal every day business I was ready for chow. The wife and I headed to dinner at a new favorite restaurant for some outstanding Cuban food. She asked if we had any other preps to take care of and we ran through the list and were good to go. The point is, I didn't have to wait in line at the gas station hoping to fill up my empty tank, I didn't have to spend my evening trying to play catch up, and I have a reasonable amount of preps based upon the expected threat. My rationale for preparedness is to limit disruption of daily life that includes impact both by last minute rushing around to get ready for a storm such as this or the direct effects of a disaster. Integrate your preps into daily life and it is not an interruption but just another task on the to-do list.

Until tomorrow, Stay Sharp,

Mike

Thursday, August 25, 2011

Do your homework

Yesterday I posted some details about prep for hurricane Irene. I wanted to follow up on how the schedule is coming and add a few bits of info.


As you may have remembered, the following was my list for today:

Thursday:
-Exchange empty propane tank for grills. While I have a couple that I rotate through there is no sense in having an empty sitting around with a chance of needing it.
-Plus up on water and staples from the wholesale club for the time frame of event. While I usually fill up Klean Kanteens or Nalgenes from a filter having fresh bottled water available in smaller than gallon containers is helpful. Once the freezer and frig are stocked I fill the dead space with water. Once cool/cold they act as a buffer should the power go out.
-Plus up on any disposables that are down and add the expected time period of disruption.
-Address any issues found during walk around of structure.
-Secure any items that may be damaged by wind or water (either rain or expected flooding).


All goals were met for the day with relative ease and efficiency due to having a plan and schedule. This prevented being overwhelmed at the last minute. By the time the Virginia Department of Emergency Management announced that the Governor had declared a state of emergency via it's Facebook account the groceries and disposables had been purchased at the wholesale club and the list was half way done. No lines and less than $150 spent on items that will be used anyway. No waste.

Having VDEM as a 'Like' on Facebook allows me to keep up with info while on the move. Similar resources are likely available for your area as government agencies work to show functionality. Using social media is a much more streamlined avenue than some of the older methods such as websites, text messages, and hotlines.

In addition to seeing the VDEM updates I have kept up with Weather.com which has detailed analytics of the storm. Remember that information is power and knowing where to get that information is key to not wasting time. I like to have both objective and subjective sources. While weather prediction is an educated guess in most cases I like to view the 'charts' as well as be able to check out what the media outlets have to say.

Anyway, time to get some shut eye. Until tomorrow.

Stay Sharp,

Mike

Wednesday, August 24, 2011

Batten the hatches

As some may have noticed APC has moved. We are now located in Richmond, VA, a couple hours in from the coast. With Irene headed up the eastern seaboard I figured it would be a good time to make a few entries about how I get ready for potential disasters that have some lead time. I don't expect us to get much out of this storm based on predicted tracks but it doesn't take much effort or money to beef up preps. I say beef up because this is in addition to preps that are already in place for unexpected disasters.

Based on our location the most likely threats include short term power outages, minor flooding, minor wind damage, and traffic on major roadways from weather related accidents and mass movement of people from the coast. There is a very good chance we won't see anything more than a slight drizzle but a few extra groceries won't hurt.

Since we do first in/first out on groceries we generally don't get much more than a week or two down on staples. Anything that doesn't spoil (fresh veggies, fruits, milk, etc) or can be frozen to extend storage is bought in quantity either when on sale or at the local wholesale buyers club. I generally pick up the fresh stuff bi-weekly unless the schedule looks busy. This keeps a good amount of food on the shelf without it going bad and it is all items that my wife and I normally eat. What does this have to do with being prepared for a disaster? This buffers us from running out of food should the power go out or the local grocery store getting crushed from a tornado. Some households have no more than the next meal and a few condiments in the frig, we strive for around 30+ days of food in regular rotation. That is not 30+ days of MREs, that is 30+ days of real food before we have to move onto other resources.

I had the opportunity as a teenager to test this theory out in a legitimate hurricane hit. Living in North Carolina when hurricane Fran came through and shut the area down for a little over a week. Power was out for eight days and roads were blocked limiting travel by vehicle. Through using a generator for a few hours a day and doing a lot of cooking on the grill we ate well which was necessary considering the days were spent clearing the knee deep foliage and 40+ trees down around our house.

So, what will I be doing to prep for the possibility of a little trouble from Irene? Nothing really exciting but things that will make life a little more comfortable should we have a few days of power being out or roads being flooded and the like.

The current forecast has Irene passing Virginia between Saturday evening and Sunday evening. So the first step, which has already been done is to develop a threat assessment. Look at what the potential interruptions to daily life will be, how severe they will be, and how to mitigate the threat. We covered those above. Next is to develop a plan with a schedule to execute those last minute preparations so you aren't running around crazy at the last minute. The point is to minimize disruption of daily life as much as possible.

Over the last few days I have been building my threat assessment with plan and schedule. The following is my schedule of plans:

Wednesday:
-Check fuel for camp stoves, grills, etc.
-Check batteries, etc.
-Check food stocks.
-Check status of misc disposables (TP, Soap, Shampoo, etc.)
-Check ammo, gear, etc.
-Review any to do list items that have been 'put off'.
-Perform a house walk around.

Thursday:
-Exchange empty propane tank for grills. While I have a couple that I rotate through there is no sense in having an empty sitting around with a chance of needing it.
-Plus up on water and staples from the wholesale club for the time frame of event. While I usually fill up Klean Kanteens or Nalgenes from a filter having fresh bottled water available in smaller than gallon containers is helpful. Once the freezer and frig are stocked I fill the dead space with water. Once cool/cold they act as a buffer should the power go out.
-Plus up on any disposables that are down and add the expected time period of disruption.
-Address any issues found during walk around of structure.
-Secure any items that may be damaged by wind or water (either rain or expected flooding).


Friday:
-Organize and inventory stocks. This is particularly important for the frig/freezer. Having an inventory will limit the number of times you have to open the unit to get food out for meals which will help to keep the cold air in and the warm air out.
-Fuel up vehicles. I would do this with a little time to spare and then top off just before the storm is about to hit. In the event a storm that isn't supposed to hit hard changes at the last minute you won't end up getting no fuel due to a run on the pumps. You also don't want to be forced into waiting in a 30 vehicle line with half a tank of gas as opposed to having the option to decide when you are down a days worth of driving from a full tank. For most that will be no more than a 1/4 tank.

Saturday Early:
-Review weather reports.
-Update threat assessment.
-Address any 'holes' in plan.
-Sweep the house for laundry and dishes. Anything that would take water to perform.
-If you have a second bath with a bath tub consider blocking the drain and filling up with water. This allows you to have water for flushing toilets or basic clean up. I would suggest cleaning the tub first.


This event is a pretty easy one for us. There is a very low risk of issue and the issues are likely short term even if we took a hard hit. No one has recommended any kind of evacuation for our area and it doesn't look like any recommendations will come out. That being said though, the model of Assess, plan/schedule, execute works whether you are expecting a direct hit or you are on the fringe of the storm path. It is the details of the plan that will change based upon your assessment.

That is all for tonight, stay tuned for how this plays out. I will try to update the blog and facebook over the next week with any updates to how preps work out and any interruptions of service from APC. Remember this is a broad view and not a step by step. Much has been glossed over since many preps for unexpected events are integrated into daily to-dos.

Stay Sharp,

Mike

Thursday, August 4, 2011

Get some...

What: Multiple weapon familiarization
Where: BeaveRun Readiness Training Center
When: Aug 1-2, 2011

After taking some time off from contracting I have been looking to get back on a gig. I didn't want to show up to assessment and be the weakest link so I have begun getting back into shape and brushing up on skills that I can't do in the standard carbine/pistol/team tactics classes.

In early July I contacted 03humpalot to get an info dump on the Intermediate Machine Gun Operators Course and check on the next class date. At that time no classes were scheduled and Buck mentioned that there may be a chance for a less formal opportunity in the near future. A couple days later Buck advised that he and the staff at BRTC would be doing a couple days of range time to work on videos and photos for program development and advertising use and offered me an invitation to come up and get some time on the guns as well as a chance to check out the facility. I told him I was there and he advised on travel and lodging info.

I made my reservations at the local Holiday Inn in Beaver Falls, just a few miles from the facility (approximately 7 min drive). BeaveRun does have a special rate which will save you a couple of dollars. The town has most amenities that you would need while there for a class including a number of good mom and pop restaurants, a Walmart, and a number of gas stations and liquor/beer shops. I did see a gun store about a mile from the facility but didn't have time to drop in so not sure how much they have to offer in the way of last minute ammo needs or the like.

TD 1 was scheduled to start at 0900 in the class room. Directions to the facility were easy to navigate and when I arrived at the complex I checked in at the 'ECP' with security and was directed to the training building. I was a few minutes early and Buck and staff were there with Tacman71 and Wayneard were already there linking some PKM belts and catching up on old times.

We loaded up the little bit of gear that wasn't already staged at the range and headed out. Once on the range we setup some targets Tacman71 (Rob Tackett) had brought up to be used and setup a variety of 'areas' on the range to allow for shooting pistols, carbines, and machineguns on the range without conflict. While there are a number of ranges at the facility we worked on the 100m range which has (from memory) a covered concrete pad with integrated work areas at the primary firing line as well as concrete pads on the left side of the range at 25m, 50m, and 75m, allowing a variety of layouts for specific points of instruction. The entire range has a deep layer of crushed stone to allow for drainage and fight flooding when the weather turns wet. The berms are high and basically cut into a large hillside.

The range has ample target stands for paper and quite a bit of steel to allow for a wide variety of instruction and exercises.

Once on the range Buck took a solid couple hours to go over the 249 and 240B platforms with me. Having used these on previous contracts but not getting a lot of time on them I had a very basic knowledge of the platforms but had (and still have) a lot to learn. We covered the following (I am sure I am leaving something out):

-Concept of the system and how it is best applied
-Tear down, inspection points, and reassembly (user level) and function checks
-Lube points/pre-mission checks
-Setting the gun up for success for various missions as well as how to setup your gear for success (slings, belted ammo, emergency mag, etc)
-BZO
-Platform options including the fixed and adjustable stock, standard and parasaw barrels, adjustable and fixed gas systems, iron sights and optics
-Mission application (vehicles, on foot PSD, on foot patrol, static op/lp, QRF, ambush) and adaption.
-Loading/unloading
-Malfunction clearance and IADs
-Barrel changes
-Application of fire on target as a solo gun and in teams
-Rates of fire, bursts, barrel life


After discussing and practicing dry these things I got behind the platforms and we went through a number of drills to get the hands on and a feel for firing them from various positions.

In addition to the 240/249 Buck also brought out his personal PKM and went through the operation of that and we got a chance to shoot it as well. He has done some significant mods to it and it is a nice piece of hardware with quite a bit of weight reduction. Given the opportunity to customize one down range I would really like to set one up similar to his.

I easily reached all the goals I had set for getting familiar with systems and then some. Buck definitely knows his stuff and has the ability to communicate it.

Later in TD 1 we ran some pistol and carbine drills, shooting on the copious amounts of steel on the range and generally having a good time shooting a variety of guns that everyone had brought out including an M203. Buck ran through a run down on the 203 and we all got a chance to shoot quite a bit of training and practice rounds with a little competition to see who could get the most hits on steel at 100m.

Around 1700 we shut down for the day, packed gear, and headed off to clean up and have chow.

The next morning we hit the range again running more time on the guns and get video and photos of specific skills and procedures including running some vehicle down drills.

In addition to another solid day of shooting the 249/240B/203 Buck broke out a M24A1 with AAC (IIRC) can and everyone took turns shooting it as well. I am not much of a precision gun guy, I have one IBA bolt gun, but that SWS was pretty slick. We also rounded out with some more drills and general shooting.

I wan't to say thanks to Buck and Aaron from BRTC, Rob from Tacstrike, Wayneard, Mark S, Mark T, and the rest of the guys that came out. I learned a lot and had a kick ass time.

I hit the road after dinner on the 2nd and didn't get all the files but look for some pics and vids to follow.

In closing, be sure to check out BRTC and the classes they have to offer. The facility is great and the staff are knowledgeable and passionate about the work they do. A great combination.

Pics and Videos:
From BRTC AAR

Early in the day, the pile kept growing...

From BRTC AAR

Buck running the SAW

From BRTC AAR

Rob on the PKM

From BRTC AAR

Putting the 203 to work


Vehicle Counter Assault Drill (Static camera)


Vehicle Counter Assault Drill (CAT SAW Gunner helmet cam)


Buck testing out a new machinegunner go
bag from EGGROLL

On the note of steel...
I do not remember how many pieces Rob brought down for us to shoot but I would venture to say that spread across the 5-10 targets we cumulatively put 10-15k rounds (a lot of it being green tip 5.56) on the targets, most of it through the 249. All of them held up extremely well with zero plate penetrations and minimal pock marks.

As you can see in the vids a number of drills put us pretty close with excellent durability on the target side and no splash or spall on the shooter side.

We literally did everything we could with guns and the 203 to try and destroy them and they weathered the storm.


Until next time...

Stay sharp,

Mike

Friday, July 29, 2011

Whew...

It's been a while. It has been pretty busy here at Austere Provisions Company as we work on expanding our product line up from trusted manufacturers as well as work on developing a number of new projects.

Keep an eye out here and on our Facebook page for news. The first item is a morale and mindset patch.
From Product Releases


A reminder to yourself and team mates that walking the warrior path is a thinking mans game and the ultimate weapon in dominating your environment is the brain.

This patch stemmed from a group of colleagues I am working with to bring some great new concepts to production to make it easier. Look for more details on this group at a later time.

One of the products that we are in final production with is a 2-1 sling device. I have had this idea on the drawing board since late 2007 - early 2008 time frame. At the time I was working in Iraq doing static security and I spent quite a bit of time in and out of vehicles, checking OP/LPs, walking posts or spending time at ECPs and the like. I preferred a single point sling for the ease of getting the gun on target but a two point was much more comfortable for 'walking the beat' and the combination of an adjustable sling (BFG VCAS or VTAC padded sling) and 'wrapping the gun up' made life easier when going hands on for searches or climbing ladders, etc. Not being satisfied with a one or the other solution I started brainstorming solutions. I came up with a couple of solutions and side lined the project while first getting APC stood up.

Fast forward to December 2010, I discussed this project with Clint Lynch of Sentinel Design and we started working on executing the concept. Below you can see the pre-production short run for testing.

From Product Releases


While I am a bit partial I will say that I am really stoked with how this turned out and can't wait to get these on the shelf. The first run is planned to be in FDE (Flat Dark Earth) followed by black as an option in later batches. As depicted in the picture the center hole is for slings with QD connections, the outer holes act both to reduce weight and allow HK hooks or mash hooks to be clipped in should you perform those parts or are using weapons that do not support QD connections. Speaking of weight reduction, the sample shown in the picture is functionally the same weight as a ITW fastex pair (male and female) so you shouldn't notice the extra weight on your sling. While there may be some variation in the production units I don't see it being much more than 0.01 ounce.

Once the first batch is done I will be sure to announce them through all of our channels and have a link to the website for purchase.

As development on other projects and expanding APC has taken quite a bit of time the blog has not had much information put out. Look for that to change, not just with product of the week but other topics of interest. So stay tuned and be sure to hit check out Facebook and the APC website.

Stay sharp,

Mike

Sunday, February 13, 2011

PRODUCT RECALL

Austere Provisions was recently notified of the recall of the "Triad Sterile Lubricating Jelly" that we include in our trauma kits and attached to the nasal airways that we sell. Due to the fact that we provide these as give-aways for courses, charity events, and product demos we are trying to get the word out as far as possible. We will replace the lubricant packet at no cost to the customer/recipient of the kit but we need to know if you still have the kit in hand. So, if you have either an IC3, LMS Comprehensive kit, or individual nasal airway that you purchased from Austere Provisions Company please email me at mike@austereprovisions.com for info on how to receive the replacement.

As of 02/13/2011 any kits or airways leaving the shop were stocked with a replacement equivalent component not effected by the recall.

Detailed information about the recall from the manufacturer:

URGENT MEDICAL DEVICE RECALL
This is to inform you of a product recall involving Sterile Lubricating Jelly manufactured by Triad Group.
This recall has been initiated due to concerns expressed by the Food and Drug Administration regarding the
validation of the gamma radiation sterilization cycles for these products. We are initiating this recall because use
of inadequately sterilized product might result in patient infection.
This recall extends to all Lots of Sterile Lubricating Jelly remaining within their labeled expiration dating (three
years), including all Lot numbers beginning with the digits 7, 8, 9, or 0. We began shipping the Lots of product
subject to this recall in January, 2007
Please immediately examine your inventory and quarantine product subject to recall – any stock of Sterile
Lubricating Jelly manufactured by Triad Group. In addition, if you may have further distributed this product, please
identify your customers and notify them at once of this product recall. Your notification to your customers may be
enhanced by including a copy of this recall notification letter.
This recall should be carried out to the user level. Your assistance is appreciated and necessary to prevent
potential patient harm.
Please complete and return the enclosed response form as soon as possible and return the recalled product to
Triad Group.
If you have any questions please call Triad Group Customer Service Monday through Friday, between the hours
of 8:30 A.M. and 4:00 P.M. Central Time: 262-538-2900 ext 2761.
This recall is being made with the knowledge of the Food and Drug Administration.
Yours truly,
Jack Waterman
Jack Waterman
Regulatory Affairs Manager

__________________________________

Thanks for your patience as we work to correct this issue,

Mike Griffin
Owner
Austere Provisions Company

Sunday, October 24, 2010

Friend or Foe?

How do you tell the difference under low light or no light conditions? How do you prevent a catastrophic incident due to misidentification? Through the use of effective signaling, both passive and active, the chances of incidents like this can be reduced if not prevented.

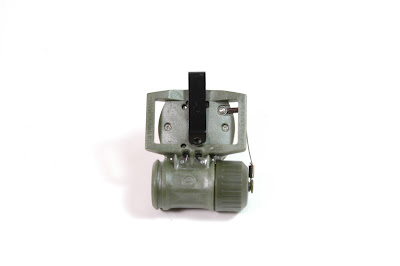
Passive means include items like IR flags, squares, unit patches, ID patches, etc. Active means include items like this week's product of the week: The Neptune Beacon from CEJAY Engineering. Designed to fill a number of roles in order to reduce the overall load today's warrior has to carry in order to complete the mission at hand.

Information from the manufacturer:

The Neptune beacon is a multi purpose multi function signal light developed to provide the soldier and officer several ID and illumination tools in one compact package. The Neptune light produces a wide, variable-output, flashing or constant on, IR, Blue or White signal. In flashing IR mode, the intense brightness of the Neptune’s signal allows it to be used as either an individual or vehicle Combat ID marker. In Blue or White signal mode, the beacon can be used as either a land or water distress signal.

The Neptune high impact plastic housing and sealed electronics are engineered to withstand harsh environments and chemical exposure. Powered by one CR123A, the Neptune is lightweight, rugged, versatile and submersible to 150 feet making the beacon superbly suited for water to land deployment and special operations applications.

Despite its small size, all Neptune functions can be controlled with one hand even when gloved. The Neptune’s signal is turned ON or OFF simply by rotating the battery cap. The single mode selection button allows the user to select light color and move between flashing or constant on signal mode. Brightness level can also be adjusted in constant on mode, making the light useful as either a signaling device or lamp.

The Neptune can be attached to PALS webbing, belts, or uniform by using the supplied locking spring clip or wrist mounted with the included wrist strap. The light can also be used with optional head/helmet strap for use as a headlamp.

Specifications

Weight: 76 Grams | 2.7 Ounce (with battery)
Size: 49mm x 27mm | 1.9" x 1.06"
Flash Mode: Constant ON with Brightness Control | Fixed Flash
Signal: IR, White, Blue LED
Battery: One CR123A
Coverage: 360 degrees x 180 degrees
Switching: Rotate Battery Cap and Mode Switch
Operating Life: 100 Hours in Flashing signal mode | 8 Hours at maximum brightness in Constant ON signal mode
Environmental: Waterproof 150 feet
Options: Neptune Signal Light (902900)


Personal experience:

When I met with Steven Bronson of CEJAY in January of this year at SHOT Show and saw the Neptune I was immediately interested. The Neptune offered all the functionality of the current beacon that I was using (IR, White, Blue flash) with the addition of the constant on and the ability to dim. As well, by using the individual LEDs for each light as opposed to a filter this eliminated white light bleed around the filter. The few full size beacons I had in my inventory from Iraq had all been taped up around the joints of the filter to prevent any white light bleed, functionally preventing easy transition from IR to white/blue. Not to mention the reduction in bulk by going to the Neptune.

While all that seemed great I was still somewhat cautious with using a new unit and even more cautious about recommending this new design to customers and colleagues. Shortly after SHOT I got signed up with CEJAY as a dealer and purchased a small number of Neptunes, integrating them into my training gear and putting them out to some colleagues for evaluation in a variety of conditions. After approximately three months of use in a variety of applications primarily attached to the body armor of full time instructors and combat developers I felt comfortable recommending them.

The unit that I retained for my personal use started life off in a container of water and placed in the on position (blue flash mode) and left in water until the battery died somewhere between day five and six, slightly longer than the rated 100 hours. The unit was removed from the water and exterior dried, battery compartment opened and found to be completely dry. Examination revealed no moisture under lens and battery was replaced revealing normal operation. After this test the unit was attached to my primary plate carrier via a short MALICE Clip (see photos below). While I do like the ability to move the Neptune around with the locking clip, the MALICE Clip offers a more permanent mounting option.

The most recent use of this light was at an EAG/Pat Rogers class in Alliance Ohio where we ran through shoot house evolutions in low light conditions. Myself and my partner ran Neptunes on the rear of our vests in order to identify ourselves to each other and the instructors and safety officers while moving through class. While other students used chem lights which were functional for this application the Neptune offered a reusable and multipurpose solution to this requirement as well as many others such as functioning under NVGs.

A few pics:

Wrist band:
From Blog album

Wrist band in use:
From Blog album

Clip:
From Blog album

MALICE Clip:
From Blog album

MALICE Clip in use:
From Blog album


In addition to identification this light is optimally setup as an emergency signaling beacon. As well, for those that may not need the IR function a training model is available with the same specifications except that the IR LED is replaced with a visible red spectrum LED making it even more well suited for backpackers, adventurers, and the like.

Check back in the next few days, I will be adding these to the website and uploading a video explaining the various functions of the Neptune.


That is all for tonight,

Mike

Wednesday, September 15, 2010

Size Matters...

...And bigger isn't always better. Especially when it comes to gear for remote/tactical/austere/etc work. Smaller, more durable, lighter, etc are the characteristics professional adventurers are looking for.

This weeks product of the week lives up to the word compact. The Pocket BVM (manufactured by MicroBVM Systems Ltd.) is an adult Bag Valve Mask that is comparable in size to a couple of combat dressings (H Bandage or OLAES Bandage). Back in the day I would take whatever BVM I could find at a reasonable price and vacuum seal it. This worked OK but had a serious memory effect on the material which left you with about half of the tidal volume that the bag started out with, and often hampered 'bounce back' or reinflation after each respiration. It was an imperfect solution at best but it was what we had 'back in the day'. Now with the medical industry actually interested in providers working outside of the hospital and even the urban street we are starting to see equipment that doesnt take up so much space, and some of it is actually getting lighter.

Some info from the manufacturer:

The Pocket BVM TM is Ideal for various emergency and clinical settings where resuscitation and breathing support to the respiratory distressed or non-breathing patient is required along side the space factor.
The Pocket BVM TM when packaged is a pocket sized fully functional BVM.
The Pocket BVM TM will replace any standard BVM by maintaining all the standard working factors and operation possibilities and will improve the use effectiveness by adding the accessibility, availability and last but not least maximize limited storage space by up to 75%.
The Pocket BVM TM advantages and capabilities
  • Up to 75% cube space reduction, space efficient
  • Textured grip to prevent slippage
  • Single Use eliminates cross contamination
  • Superior resistance to high/low temperature unaffecting bag re-expansion
  • An Endotracheal Tube can be connected to the Resuscitator
  • Deflector, see through mask
  • Peep valve adaptor can be attached
  • Ergonomic cushioned mask design fits securely to facial contours
  • Includes Bag, mask, patient valve, reservoir bag, inlet for oxygen drive line
  • Two independent Inlet Valves, The Resuscitator has two independent inlets, one for air, and the other for oxygen. When the Resuscitator is attached to an oxygen supply, it enables to Oxygen the patient.
  • The Pocket BVM TM is easy to use, without operational fatigue, it requires minimum pressure to be compressed and, due to its design, quickly recovers its shape, so as not to cause operational fatigue, even after extended continuous use.
    The Pocket BVM TM can be folded compactly to fit a small storage case.
  • The Pocket BVM TM Manual Resuscitators has enhanced performance and reliability. All equipment complies with the Safety Standards


While I have had this product for some time and been playing with one I dedicated as a demo I have been pleased with the durability. The case is not super tough but at the same time isnt over engineered thus adding unnecessary weight. Outside of the compactness the function is pretty standard of a BVM. It does not include an O2 hose, the green tubing is simply and O2 connection. In order to run O2 to this BVM you would need a double ended push fit section of O2 tubing. To me, this is a major issue as the times I will be using this I will most likely not be carrying an O2 tank and if I am I can spare an extra ounce for the extension tubing.

The valve to mask interface uses standard airway fittings, allowing you to connect to any standard airway device such as an ET Tube, King Tube, Combi-Tube, Trach, etc as well as any standard mask. Although, I have been very happy so far with the mas that is provided. It is flexible and gives good compliance as best I have been able to assess on manikins and living tissue. I have yet to have the opportunity to try one on a respiratory or cardiac arrest patient for myself. Considering that I have swapped out all my old vacuum sealed BVMs for the Pocket BVM, should the need arise (and hopefully it doesnt) I will be able to offer a report back on the function.

And no review would be complete without a few pics:

From Blog album

Diameter at the widest point (the outer ring of the case) is right at 5.25".

From Blog album

Thickness measures in at 2.5".

From Blog album

In comparison to a large OLAES Bandage.

From Blog album

Each component shown comes packed in the case, Mask-Valve-Bag-Reservoir.

From Blog album

In use with the included mask.

From Blog album

In use with a standard ET Tube.

In conclusion, if you need a compact BVM for your remote med bag check out the Pocket BVM from Micro BVM.

Where to get them:

Pocket BVM/Micro BVM now available at Austere Provisions Company


Before I sign off...

It has been a few weeks since a post, hopefully that will not be a trend. In the months leading up to SHOT everyone, including myself are working to get projects done in time for release early next year. I am looking to get out in the field and get some testing done on some survival gear and have an extensive list of tactical training planned for this fall and next year. So look for some great reviews as well as some AARs which I will be posting so customers, friends, and colleagues can keep up with our activities.


Anyway, that is all for tonight, stay sharp,

Mike

Sunday, August 22, 2010

When you need a Trauma Kit....

You need it NOW.

This weeks Product of the Week is the Blue Force Gear Trauma Kit Now. Since it's release this design has interested me for a number of reasons. The pouch is based on two piece concept which we initially saw in tear off and cable release pouches. Downsides to these are that they are higher profile due to the multiple layers of material required to support the hook/loop attachment system. Some of these pouches are very good, and I have used a number of these but the thickness and protrusion from your armor has to be accounted for when setting your gear up. The Trauma Kit Now (TKN) functions on an insert and pouch concept where the removable portion that carries your med gear simply slides into a fitted pouch. This reduces overall bulk as well as ease of access as it takes minimal strength (as you may see in an injured arm) to slide the insert out vs. overcoming a large panel of hook/loop.

Another feature I particularly like about the TKN is the insert design. As opposed to simply making it a pull out pouch it is setup almost like a nylon surgical tray allowing me to lay it on or next to a patient and work from the 'tray' as opposed to setting off the med kit grenade that is seen in some kits where you have to pull 'this' out in order to get to 'that'. Everything is exposed and easily accessed once the tray or insert is pulled out.

So let's hear the manufacturers details:

Blue Force Gear redefines the commonplace first aid kit with the fastest one-handed trauma kit ever - the Trauma Kit NOW!™ Reach for the tab of Trauma Kit NOW! ™ and receive instant access to life-saving supplies even with an injured hand. Tapered carrier design allows the insert to clear the pouch regardless of how full the kit may be. Top of pouch has MOLLE webbing for attaching a Benchmade™ Rescue hook, Trauma Shears, or one of our Tourniquet NOW Strap™ tourniquet holders (available separately). Pouch flap has a Velcro loop field for medical ID patches.
Supplies not included.

Life Time Warranty!
MADE IN THE USA


Here is a few pics of one I have setup on a chest rig:

From Blog album

The MOLLE footprint for this pouch is 3 columns by 3 rows. Actual footprint, seam to seam, is 4.5w x 6.5h.

From Blog album

Pouch footprint.

From Blog album

Insert removed. (shown with TMS MED patch and TQN Strap, not included). Insert velcroes closed to allow it to be removed from a vest or belt and tossed in a pack or tossed to an injured team mate without loss of supplies.

From Blog album

Once the insert is opened all equipment is easily accessible, to the point that multiple providers could work from a single insert on the same patient.

From Blog album

Insert show empty.


In conclusion, I really like this pouch for both self-aid/buddy-aid setups as well as setup for medic-aid either carrying one or multiples on the medic's second line or as rapid treatment kits on the exterior of a med pack. As well, this pouch easily holds both the APC Comprehensive Trauma Kit built for LMS Defense and the APC IC3 Med Kit.

Where to get it:

Blue Force Gear Trauma Kit Now available at Austere Provisions


Until next time, stay sharp,

Mike

Tuesday, August 10, 2010

As you may have seen mention in last weeks post I spent a good bit of time in June and July training. One of the courses that I attended was the LMS Defense No Light Operations course in Alliance, OH. While there I had the opportunity to check out some new and not so new gear from industry developers including Stephen Hilliard and Pat Rogers. Stephen works for Blue Force Gear and while talking between evolutions I had a chance to discuss with him the Ten Speed series of pouches. These have been out for a few years and the line has been growing to meet a wider array of end user's needs. While the idea of a multipurpose, low profile, and light weight pouch intrigued me I had obvious concerns about the durability of such a product.

So let's take a look at these things, from the manufacturer's website:

Our Ten-Speed Mag Pouch™ works from the premise that a magazine pouch should have excellent, consistent retention without a lot of securing straps, lids, or flaps to get in the way of a smooth, consistent reload. When not in use, the pouch is designed to lay flat against your vest or carrier so that it is completely discrete and unobtrusive. Primarily intended for personnel performing fast, short duration operations where speed and a low profile are paramount. Due to the use of high performance materials, the Ten Speed Pouch is also extremely lightweight registering barely three ounces on the scale. Not limited to magazines, it will also securely hold some types of Flash Bangs, Strobes, Lights, etc. Attaching to any MOLLE/PALS surface, its use is only limited by your imagination. The Blue Force Gear Ten Speed Pouch™ is made out of military-grade heavy duty elastic and Cordura fabric/webbing right here in Georgia.


During class a number of students used the Ten Speed M4 pouch to hold M4 mags but also to hold other items such as trauma kit contents, radios, flashlights, and flash bangs. While some may be thinking, "yeah, and..., I can do that with a standard triple M4 pouch". My response to that is, when you dont need to carry anything in that triple M4 pouch you now have a bulky pile of cordura sitting there that will easily get caught on any obstruction it can find when moving through a structure or in brush, not to mention the weight whereas the Ten Speed pouches are elastic based they tighten up and lay flat when not in use reducing the overall profile of your gear and they are quite trim on the weight side (weights of Ten Speed M4 Pouches: Single-1.4oz, Double-2.7oz, Triple-3.2oz).

As someone who appreciates modularity in a pouch (or most anything) the Ten Speed Series gets my vote since it offers a relatively secure package that can handle small or large items without having to spend your evening weaving MOLLE/PALS to prep for a class or a mission that has different requirements from normal gear setup. As well, for me a big benefit of this series is the ability to stash a Ten Speed Triple M4 on the back of my vest and have the ability to run my rig in more of a traditional shooters platform sans med pack and should I need to transition back to a med pack or ruck I can simply remove the contents whether they be mags, smoke, or bangs and there is no unnecessary bulk under my pack that would increase profile. To me it is a win-win.

While all of these things were positives and points I had already evaluated I had not had the opportunity to thoroughly evaluate extended use of the pouches. Having a chance to talk to Pat and look over his gear which included Ten Speed Pouches I was pleasantly surprised to see that while well worn the materials and craftsmanship had held up and continued to have quite a bit of life left in them, even after years of regular use (by my accounting Pat averages 4-6 blocks of instruction a month which equals a good bit of time in gear). This shouldnt be a surprise though as just with all Blue Force Gear the Ten Speed series is all Made In The USA with domestic components and while the price may be slightly higher than some of the options available at your local discount surplus store you wont be able to find a comparable design or execution from any of the knock off brands.

So after all that, I decided to pick a few of these up and stick them on some gear to get a feel for how best to integrate them. The one shown below is a triple that I have placed on my primary med bag. This bag is setup as an assaulter's med bag, the intent is to have a relatively low profile with the primary capability of treating and stabilizing life threatening injuries in a warm zone environment prior to moving to a cold zone or CCP where more definitive support equipment can be staged. For that reason the Ten Speed Triple works perfectly to plus up the fire superiority component of care under fire and allow me to carry extra mags, smoke, or bangs that either I can use through removal of the pack or team mates can use by working off my pack and me working off their pack or vest.

From Blog album

Extra Bullets

From Blog album

Or Extra "Band-aids"

So, if you need a lightweight and low-profile/low-bulk solution to carrying your fighting load take a look at the Ten Speed series of pouches.

Where to get them:
Blue Force Gear Ten Speed Triple M4 Mag Pouches at Austere Provisions Company


Look for more offerings of Blue Force Gear products at Austere Provisions Company, BFG is making a solid product with solid designs and putting Americans to work. I personally take pride in carrying such a product and supporting such a company and I believe the customers of Austere Provisions Company feel the same way.

So, until next time, stay sharp and stay safe,

Mike

Honorable Mentions: (Look for these more often)

www.LMSDefense.com
www.EAGTactical.com

Friday, July 30, 2010

We're Back...

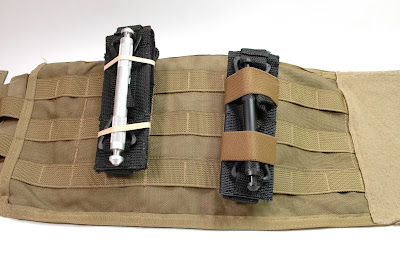
After no posts for a few weeks we are back. Since the beginning of July I (Mike) have been on the road taking classes to freshen up on skills as well as get the opportunity to work through some new concepts and network with some industry partners. To start I ran up to Alliance, OH to attend the LMS Defense No Light course and function as med support as well as cover some of the logistical support. This class was great on many levels considering I had the opportunity to get back together with my buds from LMS, meet Pat Rogers of EAG Tactical, train and network with both Stephen Hilliard from Blue Force Gear, and Clint L. from FNH, not to mention the guys from APD who were stellar hosts and tacticians. Formal AARs are available here and here (requires registration, make sure to follow instructions about posting an intro). Note: The hack for carrying chemlights on a grenade ring shown in a previous post proved to not be a solid concept. As I mentioned in the post this was untested, we tested this during class and consistently lost chemlights. I have moved to carrying mine in the elastic loops of an EAG Tactical Dump Pouch, works great.

Once class was over in Ohio I headed home to do a bit of laundry, grade some tests and head off to my part time teaching job at a local Paramedic program. Once laundry was done and I had enjoyed a few days with my family I hopped on a plane to Reno, NV to attend Firearms Instructor Development at the LMS Defense Combat Development Center located just up the road in Fernley, NV. An excellent course with a great group of warriors and the opportunity to play with some hardware while updating our software. AARs available here and here. After finishing up Instructor Dev I stuck around to help teach the Low Light course running Saturday and Sunday. The class was filled with a great group of students. The first evening was made rather "sporting" by a pretty solid dust storm rolling in but everyone endured with an even greater appreciation for full light/full visibility shooting environments. The rest of the evening and the following night presented perfect weather for a solid class. The AAR for Low Light can be found here. So after a couple hours of cleaning and packing gear and a few minutes of shuteye it was time to get back on a plane (or three) and head home in time to grade a few more tests and teach some classes.

On to this weeks Product Of The Week...

For some time now I have been working on finding a way to better streamline my gear as well as set it up in a graduated or scalable manner. Rationale being that I dont always need "everything", meaning not all training or operational missions require a complete belt rig, plate carrier/vest/chest rig, and assault pack/assaulters med ruck/etc and setting up each component so that I have a little bit of the essentials on each line allows me to tailor my gear to the mission. For a good bit of time there was no good solution for carrying med gear on your first line. When in Iraq I usually just tossed a dressing of some sort, a tourniquet, a nasal, and a decompression needle in a cargo pocket and pressed on. It wasnt comfortable, it was bulky, and routinely caught on things when getting in and out of vehicles or crawling into the access hatches of OP/LPs. After not using a battle belt for quite some time I recently went back to using one as the designs have come a long way in the last few years. I opted for the Blue Force Gear SOC-C Modular Padded Belt Kit. I chose this kit for a number of reasons, the company is solid, it is completely American Made, it is well thought out, and gives the user the option of adding armor for added protection.

Once I got my belt setup to carry bullets I started looking at options for carrying "bandaids" (med gear). Initially I dug out an old GPS pouch and stuffed a SWAT-T and Primed gauze in it and used that. After looking at designing a 1st line med pouch I decided to order a couple of Blue Force Gear Boo Boo Pouches to see what they would hold for trauma gear. Turns out they are sized just right for a wrap TQ and some form of packing material, whether it be Primed gauze or QuikClot Combat Gauze.

Here is a few pics:

From Blog album

Pouch only

From Blog album

Pouch with Primed Gauze and SWAT-T

From Blog album

Pouch with Primed Gauze and TK-4 (TK-4L also fits)

From Blog album

Pouch mounted on Blue Force Gear SOC-C belt, this one is mine and is packed with a SWAT-T and QC Combat Gauze.

So why did I do this and what are the benefits: I can ditch my armor and keep my belt rig on either while in a secure area or while running drills where armor is not necessary and may hamper the learning process but I can maintain a minimum of med gear. Just enough to stop a major bleeder until I can either get to my med pack or my vest or until a buddy can get reinforcements to me. As well, distributing gear across your 1st, 2nd, and 3rd lines allows for better distribution and prevents one line of gear from becoming overly cumbersome.

Where to get these pouches:

Blue Force Gear Boo Boo Kit Pouch at Austere Provisions Company


That is all for this week, got a couple of new items in plan to do detailed reviews on some established items in the next few weeks. Looking forward to it. Until next time, stay sharp, stay safe,


Mike

Monday, July 5, 2010

Happy 4th of July

Before we get into product of the week I just wanted to take a moment and wish everyone a happy 4th of July. I hope everyone took a moment to remember just what the 4th is all about and that we all have a lot to be thankful for because we (the Americans in the audience at least) could be living in a very different country and world had certain individuals not stood up against the strongest country of the time and said NO MORE! As well, a big thanks to all the vets out there who have worked so hard to maintain the security of what our forefathers put in place.

So, onto the product of the week:

When you need a tourniquet...

You need it NOW! That is where the name came from for the Tourniquet NOW! Strap from Blue Force Gear. For years I have resisted the urge to use a dedicated holder for my TQs and always opted to stash them on retention straps for tear off med pouches or to simply rubber band them into the MOLLE on my vests, plate carriers, or packs. At SHOT this year I got a chance to play with a number of Blue Force Gear products and really liked the new additions to the line. I have been using BFG slings for years and they have always held up no matter what the application from training to deployments. Couple that with the fact that all products with the Blue Force Gear name on them are made right here in The USA and it is hard to go wrong.

I recently added Blue Force Gear to the line up here at Austere Provisions Company and as usual I made a starter order of products that I wanted to try out based on industry feedback as well as personal interest. The Tourniquet Now! Strap was one of those starter items and I have been playing around with it and have been very pleased with both the durability and how much more low profile of a solution it is over my long standing rubber band technique.

Let's see what BFG has to say about it and then we can get into some more details...

Our Tourniquet NOW! Strap is an easily attached adapter that securely mounts a tourniquet or similar sized object to any MOLLE surface for instant access. Bands can be used in two different configurations to fit currently available combat tourniquets.


Short, sweet, and to the point. Some more details. The strap is made with a polymer stiffener to create a firm foundation that simply slides into MOLLE loops allowing elastic bands to stick out between the rows of MOLLE.

Here is a pic of the strap not in MOLLE:
From Blog album


Here is a comparison shot with my more traditional method of securing.
From Blog album


An important factor in preventing these from coming loose in either securing method is placement on your gear. Ideally you would place these up on your chest where they are both easily reached in the event you need the tourniquet as well as are slightly more protected than down on the lower trunk section of gear. I kept TQs strapped to my chest my entire time in Iraq and never had one come loose unless I was pulling it off to put it to use. Now I have heard of a single report of a SOFT-T coming loose from a Tourniquet Now! Strap, I think this can be avoided with good placement and giving a glance over your gear before go time to make sure everything is tight and right.

To reduce the profile of the SOFT-T on my vest I fold it so that the clasp mechanism is offset to one end and tuck the windlass retainers under the windlass. This reduces the possibility of things get caught on the TQ iteself. As well I turn the clasp towards the vest so it is not sticking out further reducing the likelihood that it would catch on anything during movement. Here is a more detailed shot of what I feel is a solid placement and packaging:
From Blog album


So, where to get this thing:

Blue Force Gear Tourniquet NOW! Strap available at Austere Provisions Company


Until next week, stay sharp and stay safe,

Mike

Friday, June 25, 2010

Safe Light...

And a new hack.

After a few weeks of absence taking care of a few new projects and getting settled back in after the LMS Defense Customer Appreciation Weekend (check AAR Here) it is good to finally be putting up another product of the week.

This weeks product is AmeriGlo Light Sticks. An obvious addition to our Low Light segment of products, providing users with a safe, cool to the touch, disposable light source for direct illumination of an area or for signaling in various ways.

A little information from the manufacturer:

Our most popular item! AmeriGlo's 6" light stick is always individually foil wrapped to insure bright and dependable light when needed.

Used by military, law enforcement, paramedics, campers, hikers, scouts, utility companies, hotels, schools, boaters, and well-prepared individuals. Emergency personnel and troops alike prefer AmeriGlo light sticks for its versatility in the field, using this special locking hook.


Color Specific information from the manufacturer:

Green is the brightest color in the 12-hour product category. The 6" green light stick provides adequate light for a standard-sized hotel room (or household bedroom) for 12 hours.

Yellow is the 2nd brightest color in the 12-hour product category. The 6" yellow light stick is ideal for illumination, marking, and signaling.

Red is often used in training exercises when many colors are needed. Red is also a 'stop/warning' indicator.

The infrared light stick can only be seen (in its glowing state) via certain grades of night vision devices. The AmeriGlo IR stick has special raised bumps (patent pending) on the stick's housing, allowing the end-user to quickly and safely distinguish the IR stick from a visible spectrum colored light stick prior to activation. This unique feature can be a life-saver in covert operations


While AmeriGlo makes a wide variety of colors and sizes of light sticks we have opted to start with the most popular colors field use which also happen to be the colors (visible light sticks) used for triage during mass casualty incidents, so these can pull double duty for our customers that are First Responders and looking for a light source or signaling capability for an aid bag. The IR light sticks are something that have been requested by a number of our customers for training and operational use under night vision, for those not familiar you must have a night vision device to observe light produced by the IR light sticks.


In a market where numerous companies produce a similar product it is the fine details that stand out and make a single product lead the pack. AmeriGlo and their light sticks are that product. Details such as the following are why we choose AmeriGlo:

-Small latching hook at tip of light stick for clipping onto gear
-Innovative product development such as stippling on IR light sticks for tactile identification under light discipline
-Durable packaging to increase shelf life
-Consistent product
-Ease of interaction and customer service

A few photos of the light sticks:

Visible colors
From Blog album


IR (should have an adapter for my DSLR soon to shoot with my PVS-14 and get some good low light shots)
From Blog album


Latching Hook:
From Blog album


Solid Loop:
From Blog album


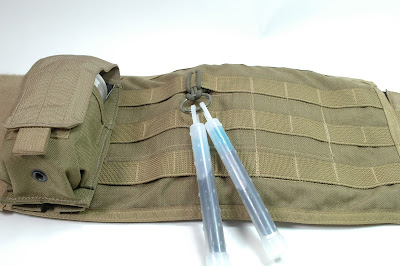
And of course I mentioned in the intro that I had a new hack this week. For a long time guys have been carrying light sticks on their tac gear, now I dont want to go into too much detail about the why but while playing around with shooting photos today I found what may be a solid new way to carry these for rapid deployment. A little background on the motivation: I am always trying to streamline my kit by reducing weight, bulk, and anything that can catch the environment around me when training or working. Anytime in the past that I have carried light sticks on my vest for quick deployment I have hung them off a carabiner through a loop of 550 cord or if I was using another model of light stick I had to tie 550 cord through the enclosed loop of the light stick and I just clipped the cord loop into the carabiner. Not liking the carabiner because of the bulk and the likelihood of it snagging on something I have looked for a better solution. Today while setting up a photo I decided to clip some of the light sticks into a grenade pull ring and then clip into the biner. Looking at the system the biner suddenly seemed unnecessary and I pondered other ways of attaching it to a section of MOLLE on my vest.

I ended up coming up with the idea to simply use a small section of 550 cord to larks foot around the pull ring and then larks foot around the MOLLE. This created a low profile, stowable clip in point for my light sticks that was less likely to catch on stuff, quieter, smaller, lighter, and all around cool. Below is a setup guide on how to put this together since my ability to paint a picture with words may not have been sufficient:

Take a pull ring and larks foot a section of 550 cord through it. I found that a 13-14" piece of non gutted 550 is just long enough to complete both larks foots and minimize excess. You could probably make it shorter if you gutted it.
From Blog album


Slide the 550 cord through a section of MOLLE (shown on clear section of MOLLE)
From Blog album


And larks foot around the MOLLE (I stowed the knot behind the webbing, photo may be slightly deceiving):
From Blog album


Hang your light sticks:
From Blog album


I like to hang mine between pouches that have a small gap so that they dont bang around as much (reduce profile, noise, and possible loss) so you perform the same technique on an occupied section of MOLLE between the pouches:
From Blog album


End Result:
From Blog album


Another Angle:
From Blog album


As I said before, I literally just came up with this today so it will take some time on the range and in the shoot house to vet but it may be a solid solution to streamlining and cutting ounces from your gear. Not to mention pull rings are cheap as long as you have a source for them ;-).


Where to buy this stuff, huh? Right here:

AmeriGlo 6" Light Sticks in visible spectrum colors (Red, Yellow, Green) at Austere Provisions Company

AmeriGlo 6" Light Sticks in InfraRed spectrum at Austere Provisions Company


That's all for this week, stay sharp, stay safe,

Mike

Monday, June 7, 2010

No product of the week this week

We are busily packing gear up to head out to Fernley Nevada to the LMS Defense Combat Development Center (CDC) to attend the Customer Appreciation Weekend. We will be closing up shop on Wednesday June 9th at 1600 and reopening on Tuesday June 15th at 0800. If you have an urgent gear need, drop us a line at 540-632-2272 or by email (preferred) at mike@austereprovisions.com and we will do whatever we can to help get you squared away in our absence.

While we are away we plan to get some good shots of gear in use so check back here next week for some new photos of your favorite gear being run through the sand and scrub brush.

Until next week, stay sharp and stay safe,

Mike